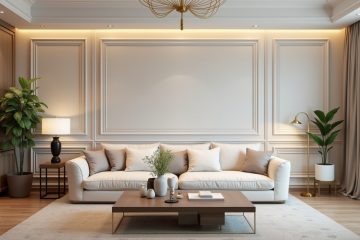
Curating the Perfect Gallery Wall: A Step-by-Step Guide for Beginners

A gallery wall is one of the most impactful ways to inject personality and soul into a living space. It transforms a sterile, blank surface into a narrative of your life, interests, and aesthetic preferences. While the idea of hanging multiple pieces of art might seem overwhelming to a beginner, it is essentially a puzzle where you get to define the pieces and the borders. As we move through 2026, the trend in interior design has shifted away from the overly staged, identical look toward a more eclectic and curated feel that celebrates individuality.
The beauty of a gallery wall lies in its versatility. It can be a symmetrical grid of architectural sketches in a formal dining room or a sprawling, mismatched collection of family photos, travel mementos, and textured objects in a cozy hallway. Regardless of the style, a successful gallery wall requires a balance of planning and intuition. This guide will walk you through the professional process of selecting, arranging, and installing a gallery wall that looks like it was curated by an expert.
Defining Your Aesthetic and Collection
Before you pick up a hammer, you must decide on the mood you want to create. The aesthetic of your gallery wall will dictate the types of frames you choose and the spacing between the pieces.
The Uniform Look
If you prefer a sense of order and calm, a uniform gallery wall is the best approach. This involves using identical frames and mats for every piece of art. Often arranged in a perfect grid (for example, a 3×3 or 4×2 layout), this style works exceptionally well with black-and-white photography, botanical prints, or a series of maps. The uniformity creates a sophisticated, high-end look that anchors a room without overwhelming it.
The Eclectic Mix
For those who want a more dynamic and lived-in feel, the eclectic approach allows for a variety of frame styles, colors, and textures. You can mix vintage ornate gold frames with modern black metal ones and include non-traditional items like a small wall sculpture, a woven basket, or a dried botanical arrangement. The key to making an eclectic wall feel cohesive is a unifying element, such as a consistent color palette within the artwork or a shared theme like travel or nature.
Gathering and Prepping Your Artwork
A common mistake is trying to fill a gallery wall all at once with cheap, generic prints. To create a space that feels authentic, take your time gathering pieces that actually mean something to you.
-
Vary the Scale: A wall filled with only small frames can look cluttered and busy. Conversely, a wall with only large frames can feel heavy. Aim for a mix of one or two “anchor” pieces (large frames) and several medium and small pieces to fill in the gaps.
-
Think Beyond Paper: Consider including 3D elements. A vintage clock, a small mirror, or a ceramic wall plate adds depth and breaks the monotony of flat glass and paper.
-
Standardize Your Hardware: While the frames can be different, ensure your hanging hardware is consistent. Using a variety of wires, d-rings, and sawtooth hangers can make leveling the wall a nightmare.
Planning the Layout Without Damaging the Wall
One of the biggest hurdles for beginners is the fear of making unnecessary holes in the drywall. Professionals use a simple paper-template method to finalize the layout before the first nail is driven.
Step 1: Trace and Cut
Place each of your frames on a large roll of brown craft paper or even old newspapers. Trace the outline of each frame and cut out the shape. On each paper template, mark exactly where the hanging hardware is located on the back of the frame. This allows you to see where the nail needs to go relative to the top of the frame.
Step 2: The Floor Trial
Clear a space on the floor that is the same size as the wall area you intend to fill. Arrange your frames on the floor, moving them around until the composition feels balanced. A good rule of thumb is to start with your largest “anchor” piece slightly off-center and build outward. Aim for a gap of 2 to 3 inches between frames for a tight, modern look, or 4 to 6 inches for a more traditional, airy feel.
Step 3: Wall Mapping
Once you are happy with the floor layout, use painter’s tape to stick your paper templates onto the wall. This is the stage where you can step back and see how the arrangement interacts with your furniture and the room’s lighting. You can easily adjust the templates without damaging the paint.
Installation and Leveling Techniques
Once the templates are perfectly positioned, the actual hanging process is straightforward. Because you marked the hardware location on the paper templates, you can drive your nail or screw directly through the paper and into the wall.
Tools for Success
To ensure your wall looks professional, you will need a few basic tools:
-
A Level: A 24-inch or 48-inch level is essential to ensure that the horizontal lines of your frames are straight.
-
A Measuring Tape: Consistency is key. Ensure the spacing between the frames remains uniform throughout the installation.
-
Adhesive Putty or Bumpers: Place small rubber bumpers or a tiny bit of adhesive putty on the bottom corners of each frame. This prevents the frames from shifting over time when doors slam or when the house vibrates.
Hanging at the Right Height
A frequent error is hanging a gallery wall too high. The center point of the entire gallery should be at eye level, which is generally 57 to 60 inches from the floor. If you are hanging the gallery above a piece of furniture like a sofa or a sideboard, the bottom of the lowest frames should be about 6 to 10 inches above the top of the furniture piece.
Maintaining Balance and Growth
A gallery wall does not have to be “finished.” One of its greatest strengths is that it can grow and evolve over time. If you leave your arrangement slightly open-ended on the edges, you can continue to add new pieces as you find them.
When adding to an existing wall, focus on maintaining the visual weight. If you add a heavy, dark frame to the left side, balance it with something of similar visual impact on the right. If the wall starts to feel too “bottom-heavy,” add a few lighter, smaller pieces toward the top to draw the eye upward and utilize the full height of the room.
Frequently Asked Questions
How do I choose the right wall for a gallery?
While you can put a gallery wall anywhere, the most successful locations are those that provide a natural focal point. A large wall behind a sofa, the space flanking a fireplace, or a staircase wall are ideal. Avoid walls that are too small or narrow, as the collection can feel cramped and lose its impact.
Can I create a gallery wall in a rental apartment without nails?
Yes, high-quality adhesive strips are a great alternative for renters. Ensure you check the weight capacity of the strips and follow the instructions for removal to avoid peeling the paint. Note that adhesive strips work best on smooth surfaces and may not adhere well to heavily textured walls.
Should I use glass or acrylic in my frames?
Glass is the traditional choice and is more resistant to scratching, but it is heavy and can break if a frame falls. Acrylic is much lighter and safer for homes with children or pets. If your gallery wall is opposite a window, consider non-reflective or museum-grade glass to reduce glare and protect the art from UV fading.
How do I mix black-and-white photos with color art?
To make this work, use consistent framing. If you have a mix of color and monochrome art, using all black or all white frames can bridge the gap between the different styles. Alternatively, you can use a consistent mat color, such as a deep cream or a crisp white, to unify the collection.
Is there a specific light fixture that works best for gallery walls?
Track lighting or adjustable recessed “eyeball” lights are excellent because you can aim the beams specifically at individual pieces or zones of the gallery. For a more classic look, picture lights that attach to the top of the frames provide an elegant, library-like feel, though they require more complex wiring or battery-powered models.
What should I do if my wall is not perfectly flat?
Older homes often have slightly bowed walls. If a frame is not sitting flush, use a small piece of foam mounting tape on the corner that is sticking out. This will help the frame appear level and stable despite the wall’s imperfections.
How do I clean a gallery wall without knocking things over?
Use a microfiber duster or a soft-bristled brush to gently remove dust from the tops of the frames and the glass. Avoid spraying glass cleaner directly onto the frames, as the liquid can seep behind the glass and damage the artwork. Instead, spray a small amount of cleaner onto a cloth first and then wipe the glass.